New blog

Tuesday, August 6, 2013

Zipper Purse

I know it's been a very long time since I posted last, but I've been a busy girl :)

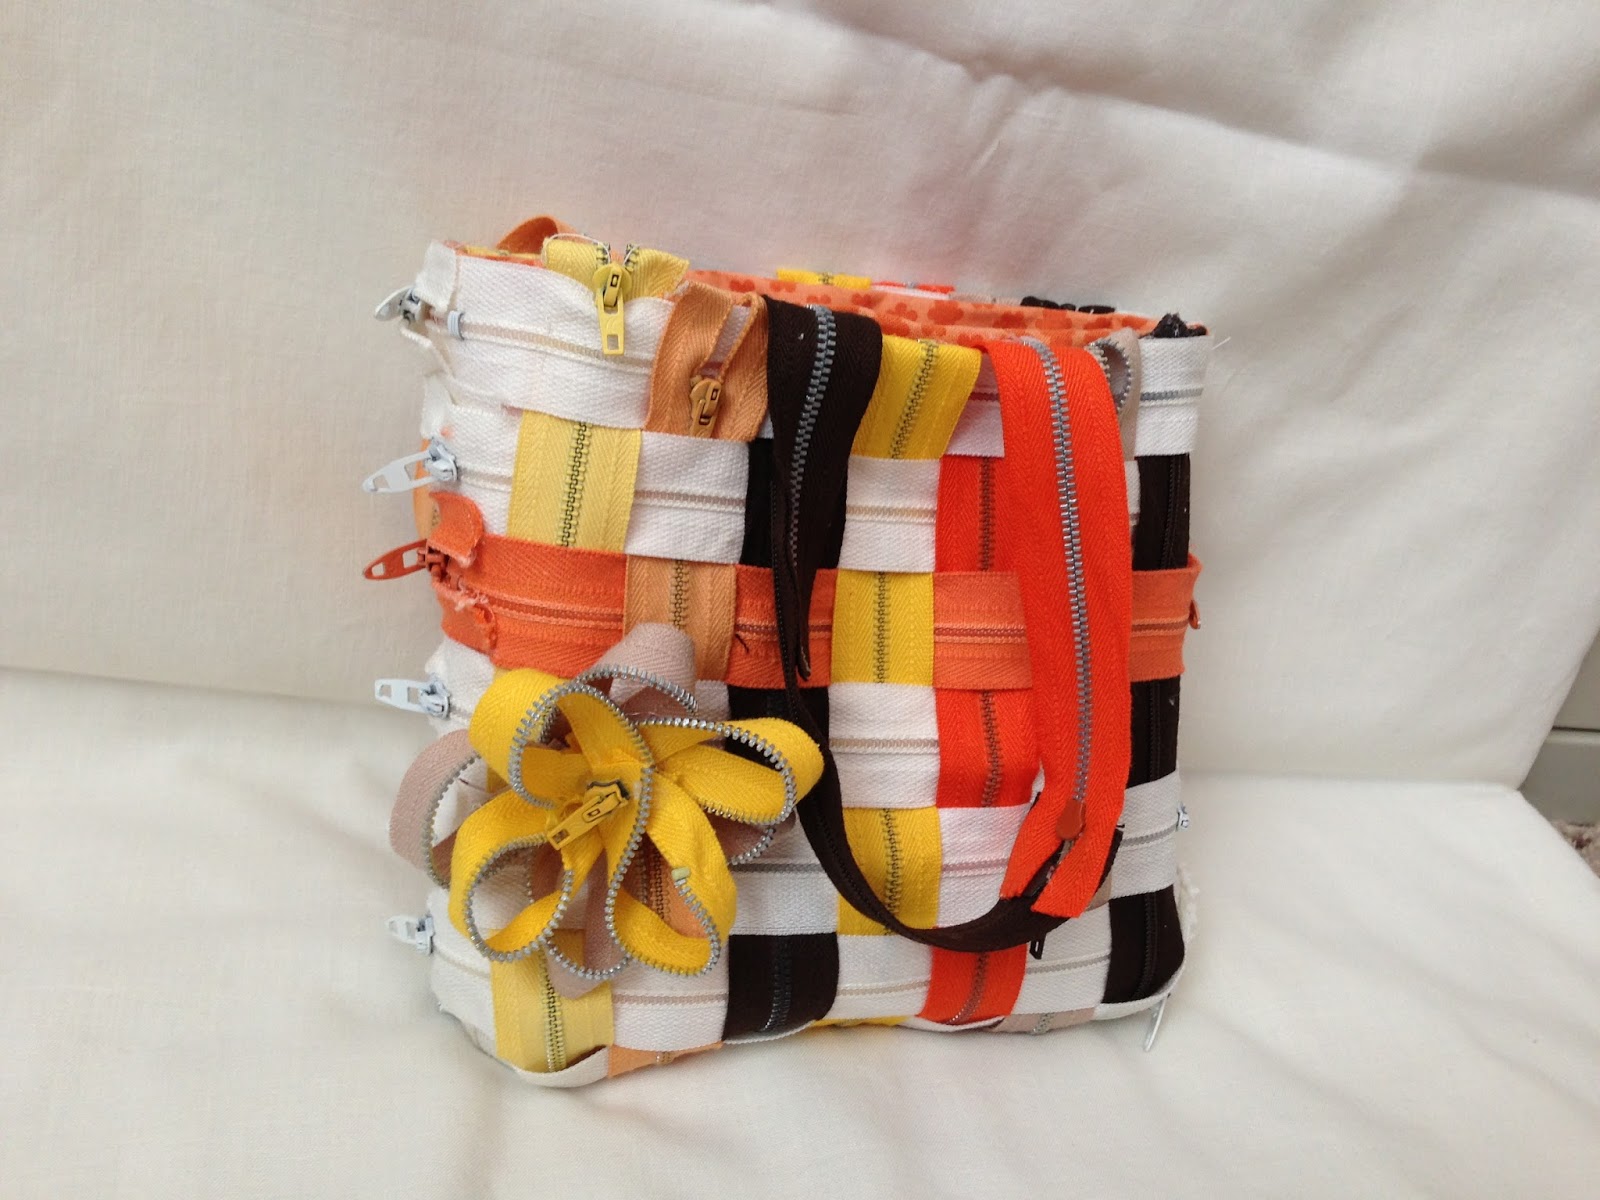
Have you seen the very cute Zipper Purse going around on Pinterest??


I thought this was the cutest thing ever!!!  The purse was featured on Sewing Secrets
I tried to follow her instructions, but I'm not the best sewer ever, so I had to take matters into my own hands as you can see below :)

Supplies:


Coats All Purpose Zippers, 7”, 14
zippers in a variety of colors
Coats All Purpose Zippers, 22” 7 zippers for horizontal strips and handles (if I had to make it again I would have 5 18" and 2 22 - 24" zippers for the handles, you would have to pay attention to the placement of the zippers so the handles are in the right place)
Hot glue
Scissors
Straight pins
Sewing Machine


1. Lay out and weave the zippers as the
diagram shows flat on a table and pin in place.
It took me a while to figure out the pattern that I wanted that's why you can see some of the pics are different.  I wish the tut above would've had more info!!!  So I had to guess :)
First I put all the 7" zippers the same way, then I figured that I would want them to show the zippers more on the side so I rotated them.  The 7" zippers are going horizontal and the 22" are vertical.


 As you can see I had them all pinned together and decided to change them...  Then I decided to do I liner, I had some extra material & backing lying around from making the personal progress holders (I had thought I had done a post on that, oops) so I just cut to fit with half an inch laying over every side.

I ironed the backing onto the back of the material


I pinned the zippers to the backing and the material making sure the material faced outward


2. To form the tote, bring the sides together
and pin in place for a temporary hold.
I folded the zippers in half making sure the front of the material faced each other, then I sewed the material together, making sure not to include the zippers. 

(I had sewn the ends of the Zippers to the material as you can see in some of the pictures, this ended up being a bigger problem so I had to take it out.  I would tack the edges of the zippers to the material)


 I trimmed off the extra material and started to glue the Zippers to the backing, I would first glue the bottom of the zipper so the zipper pull would be on top.  Make sure to trim all the jagged egdes that are going to be showing


 Now to take care of the longer zippers, these were not tacked or sewn to the material so I could figure out my handles. 

 I picked the zippers that I wanted for the handles, it ended up being two away from the edges 

Cut and tuck all other 22"inch zippers between the material lining and the woven zippers.

I ended up having one side of the handles a perfect fit for a handle and one that was too short, so I took one of the ends that I cut off and glued it on.
 Then I glued the woven zippers to the material that I had tucked.  And here is my final product...

Turned out pretty well for not really understand the tut above.  I did burn myself once with the glue gun, make sure to be careful


 I also made a flower with the parts of the zipper that I had cut off, I think I like it better without


Monday, February 11, 2013

Temple Blocks

I found a wonderful idea for the young women on pinterest.  It let me to Lil Luna  She's awesome!!!  She already has tons of temples that she altered to look vintage.  I had to alter just one of the temples the girls wanted...

Go visit Lil Luna for more great ideas...


It was so easy...  I even made on for my little one :)


Friday, February 1, 2013

Oatmeal Cookies & Peanut Butter Bars

I know it's been a very long time, life gets so busy some times!!!

I made some very good treats lately...

First Oatmeal Cookies, I found them at allrecipes.com 

Original recipe makes 2 dozen Change Servings
  • 1 cup butter, softened 
  • 1 cup white sugar 
  • 1 cup packed brown sugar 
  • 2 eggs 
  • 1 teaspoon vanilla extract 
  • 2 cups all-purpose flour 
  • 1 teaspoon baking soda 
  • 1 teaspoon salt 
  • 1 1/2 teaspoons ground cinnamon
  • 3 cups quick cooking oat

    Directions

  • In a medium bowl, cream together butter, white sugar, and brown sugar. Beat in eggs one at a time, then stir in vanilla. Combine flour, baking soda, salt, and cinnamon; stir into the creamed mixture. Mix in oats. Cover, and chill dough for at least one hour.
  • Preheat the oven to 375 degrees F (190 degrees C). Grease cookie sheets. Roll the dough into walnut sized balls, and place 2 inches apart on cookie sheets. Flatten each cookie with a large fork dipped in sugar.
  • Bake for 8 to 10 minutes in preheated oven. Allow cookies to cool on baking sheet for 5 minutes before transferring to a wire rack to cool completely. 
  •  
Then I made some yummy Peanut Butter Bars

I found them here at Tried and Tried Again

School Lunch Peanut Butter Bars
1 1/2 C Flour
1¼ tsp. Salt
½ tsp. Baking Soda
¾ C Butter
¾ C Sugar
¾ C Brown Sugar
1 ½ tsp. Vanilla
1 1/2 C Creamy Peanut Butter (split)
2 Eggs
1 ½ C Quick Oats
Frosting:
½ C Butter (1 stick)
3 ½ C Powdered Sugar
2 T Cocoa
¼ C Milk (I use whatever I have in the fridge)
1 tsp. Vanilla
Preheat oven to 350 degrees. In a small mixing bowl, mix together flour, baking soda and salt. In a large mixing bowl, cream together butter, sugars, 3/4 C peanut butter, eggs and vanilla until light and fluffy. Gradually add dry ingredients, just until incorporated. Then, stir in the oats. Spread onto a greased 11 x 15 Jelly Roll Pan (cookie sheet). Bake for 12-15 minutes, or until golden brown. Cool for 10 minutes.

The frosting is a two step process. First, whip the remaning ¾ C Creamy Peanut Butter until it becomes lighter colored and fluffy. Carefully spread the whipped peanut butter over the pan cookie.

Then, add butter to a small sauce pan and melt the butter. Add the milk and cocoa. Cook over medium heat, stirring constantly. Heat just until boiling. Remove from heat and add vanilla. Then, gradually add the powdered sugar. Stir until thickened. Pour over the peanut butter and gently spread over the cookie. Cool completely, and slice into bar cookies.